New patterns: Melisma Hat & Scarf

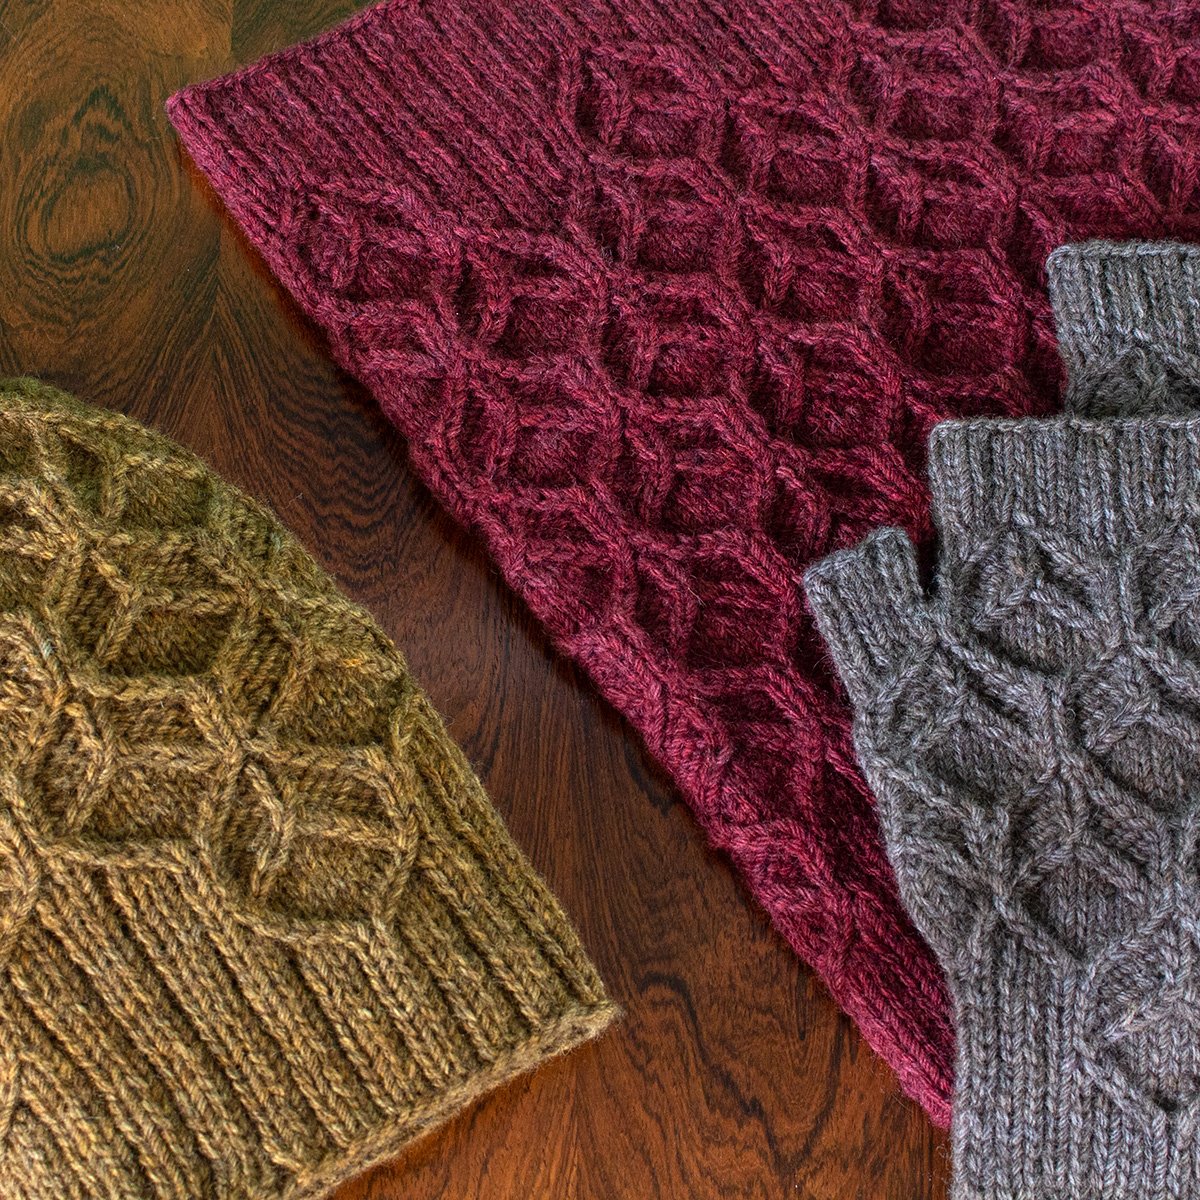
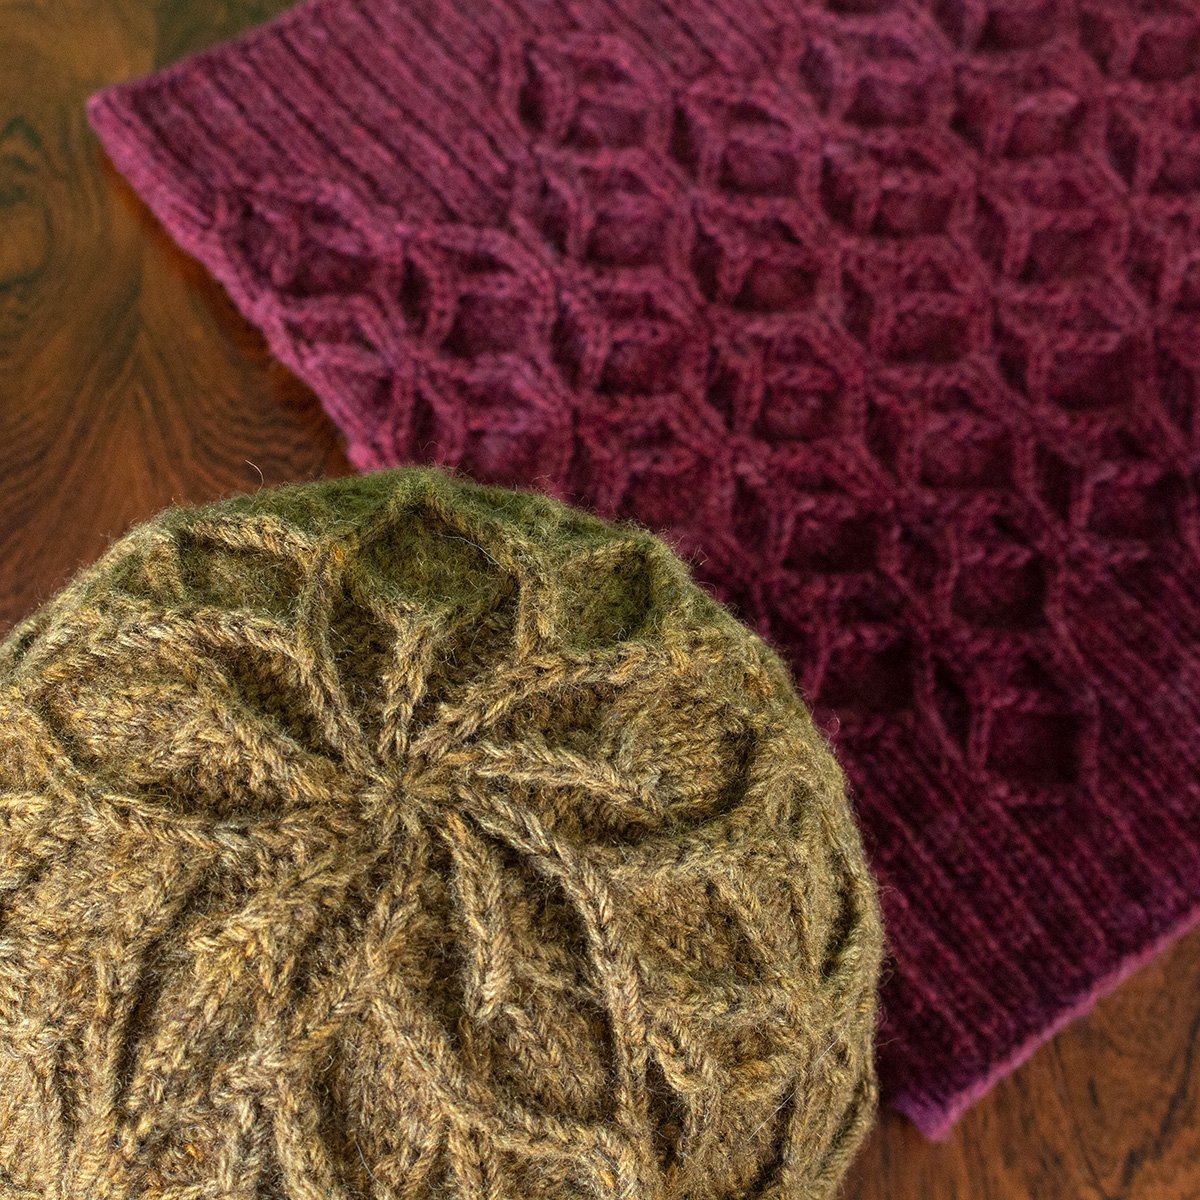
This classic hat and scarf combo is all about the cables! They twirl across a background of 2x2 ribbing, and with only a handful of cable crosses on alternating rounds or rows the set is relatively quick to knit in worsted weight yarn. Best of all, the cable pattern is moreish and satisfying to watch unfold. The hat, with instructions for two very stretchy sizes, and the scarf, with two width options and customisable length, would make thoughtful gifts for loved ones of any gender.

Inspiration & design journey

These designs have been in the pipeline for quite some time. An initial idea for a scarf with diagonally flowing cables was charted, swatched, and fussed with several times before I hit upon this nicely balanced version. Then late last year I submitted the design to Pom Pom Quarterly for an issue which, as it later turned out, was not to be. And so I did what any self-publishing designer does with a rejected design they adore: I sourced the yarn (kindly provided by John Arbon Textiles) and started knitting.

I love the way these cables tumble over each other as they flow across their ribbed background. Being a choir nerd with a background in musicology, this sort of movement makes me think of lines of melody twirling together in a duet. Leaning into this, I’ve named the patterns melisma, after the technical term for a vocal run or a group of several notes sung to one syllable.

Yarn requirements

I knit my hat sample using a single skein of Harvest Hues Worsted from John Arbon Textiles in the colour Burdock, and four skeins for my scarf in the colour Russet. Harvest Hues is a blend of equal parts Bluefaced Leicester, Falklands Merino, and Zwartbles wool, and I really love the depth of colour which comes from blending the dyed and naturally dark brown fibres together before spinning. A 4ply version of the yarn and fibre for hand spinners are also available in the same blend and colour range.

Special techniques

The crown of the hat uses double decreases (k3tog and sssk) to mimic the cable crosses in the body of the hat. One nice benefit of this is eliminating any cables from the crown decreases section, so there’s no need to wrangle a cable needle as well as your dpns or other small circumference needles. The scarf includes an optional fringe, which I’ve written a tutorial for in case my tips might be helpful: How to add fringe to a scarf.

Melisma Hat features:

  • A beanie with twirling cables and 2x2 ribbing for plenty of stretch

  • A quick and satisfying knit with only a handful of cable crosses on alternating rounds

  • Two sizes are included, to fit 18-20 (22-24)”/46-51 (56-61)cm head circumference

  • Requires 130 (173)yds/119 (158.5)m of worsted-weight yarn (shown in John Arbon Textiles Harvest Hues Worsted)

  • Choose a wool or wool-blend yarn in a solid or heathered shade

  • Hat dimensions, after blocking and unstretched: 11.5 (15)”/28.5 (38)cm brim circumference, and 8.5 (9)”/21.5 (23)cm long from brim to crown. Sample shown in size 2 on my 22”/56cm circumference head. 

Melisma Scarf features:

  • A scarf with twirling cables over a background of 2x2 ribbing, with optional fringe

  • A quick and satisfying knit with only a handful of cable crosses on most right side rows

  • Two width options are included, and the length is easily adjustable to your preference

  • Requires 753 (1097)yds/688.5 (1003)m of worsted weight yarn (shown in John Arbon Textiles Harvest Hues Worsted)

  • Choose a wool or wool-blend yarn in a solid or heathered shade

  • Scarf dimensions, after blocking and unstretched: 72.5”/184cm length, and 10 (14.5)”/25.5 (37)cm width. Sample shown in narrower width option (10”/25.5cm).

Find out more about my Melisma Hat and Melisma Scarf patterns, including Ravelry and Payhip purchase options.
New pattern: Candy Cones

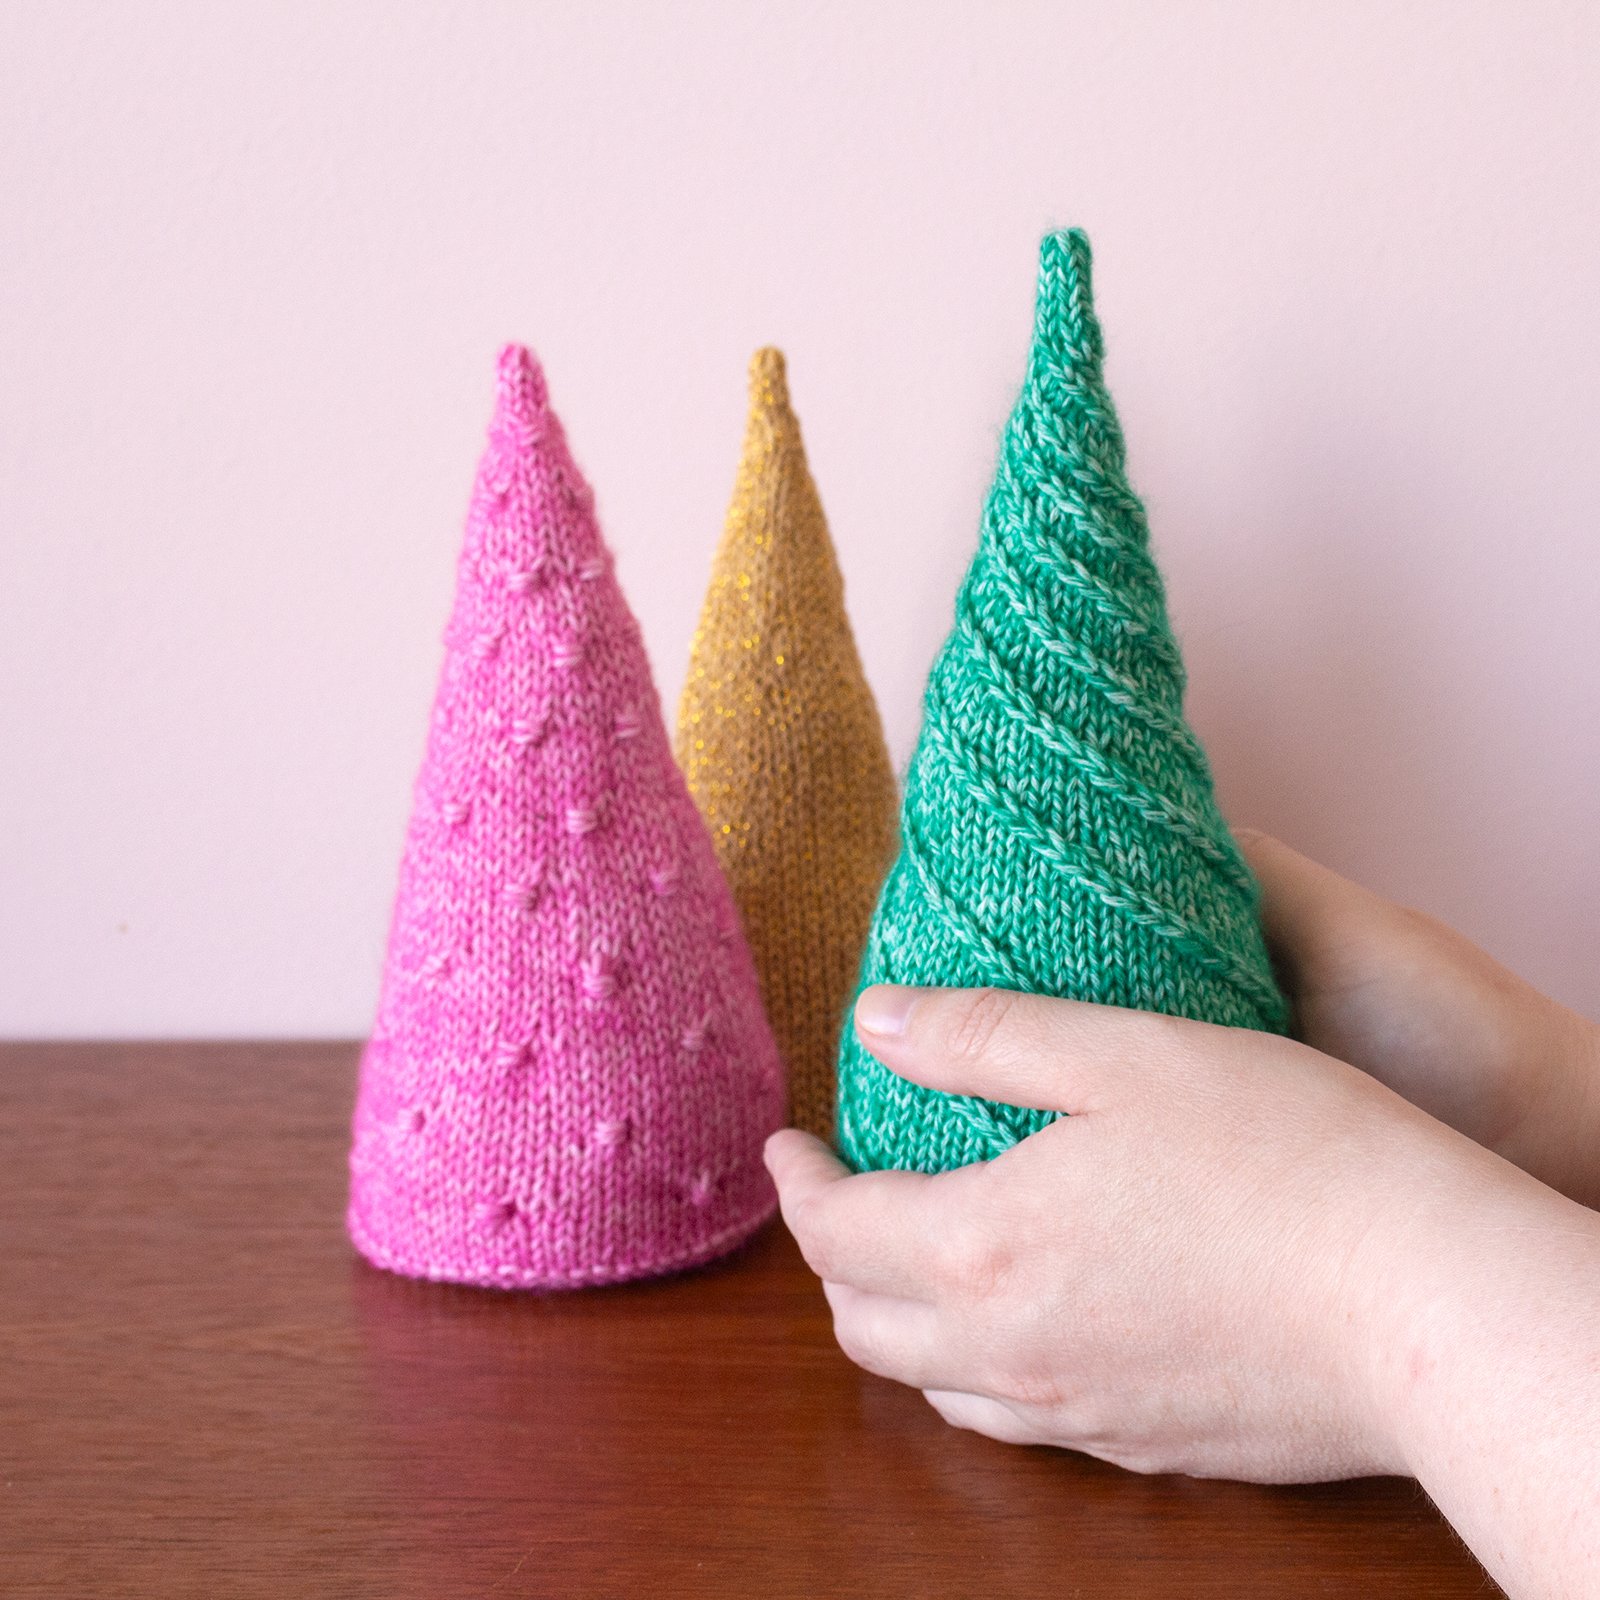
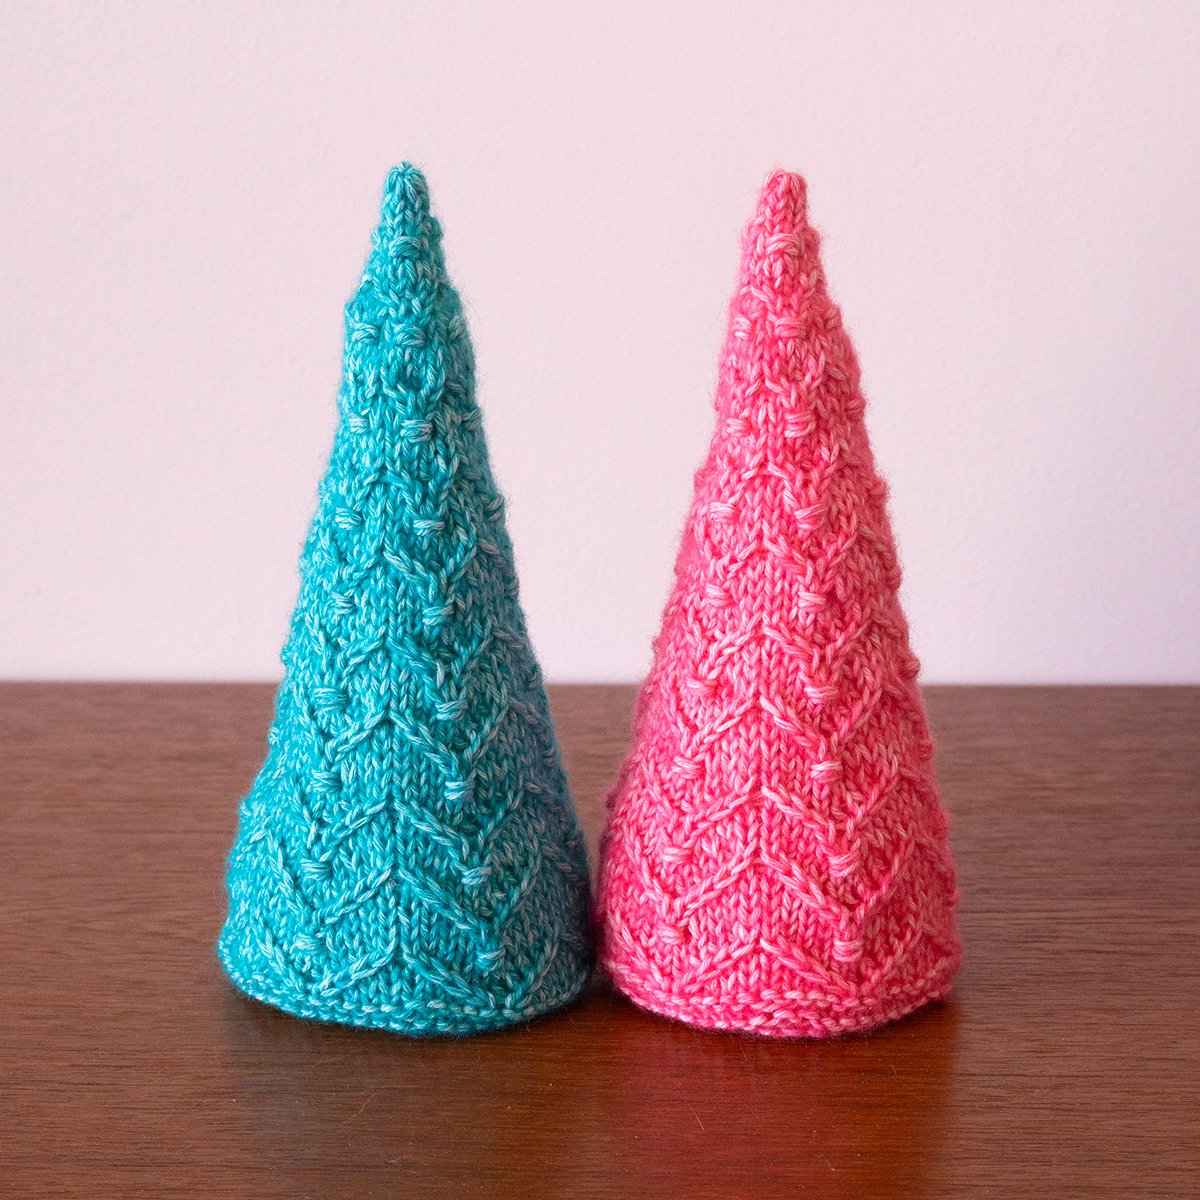
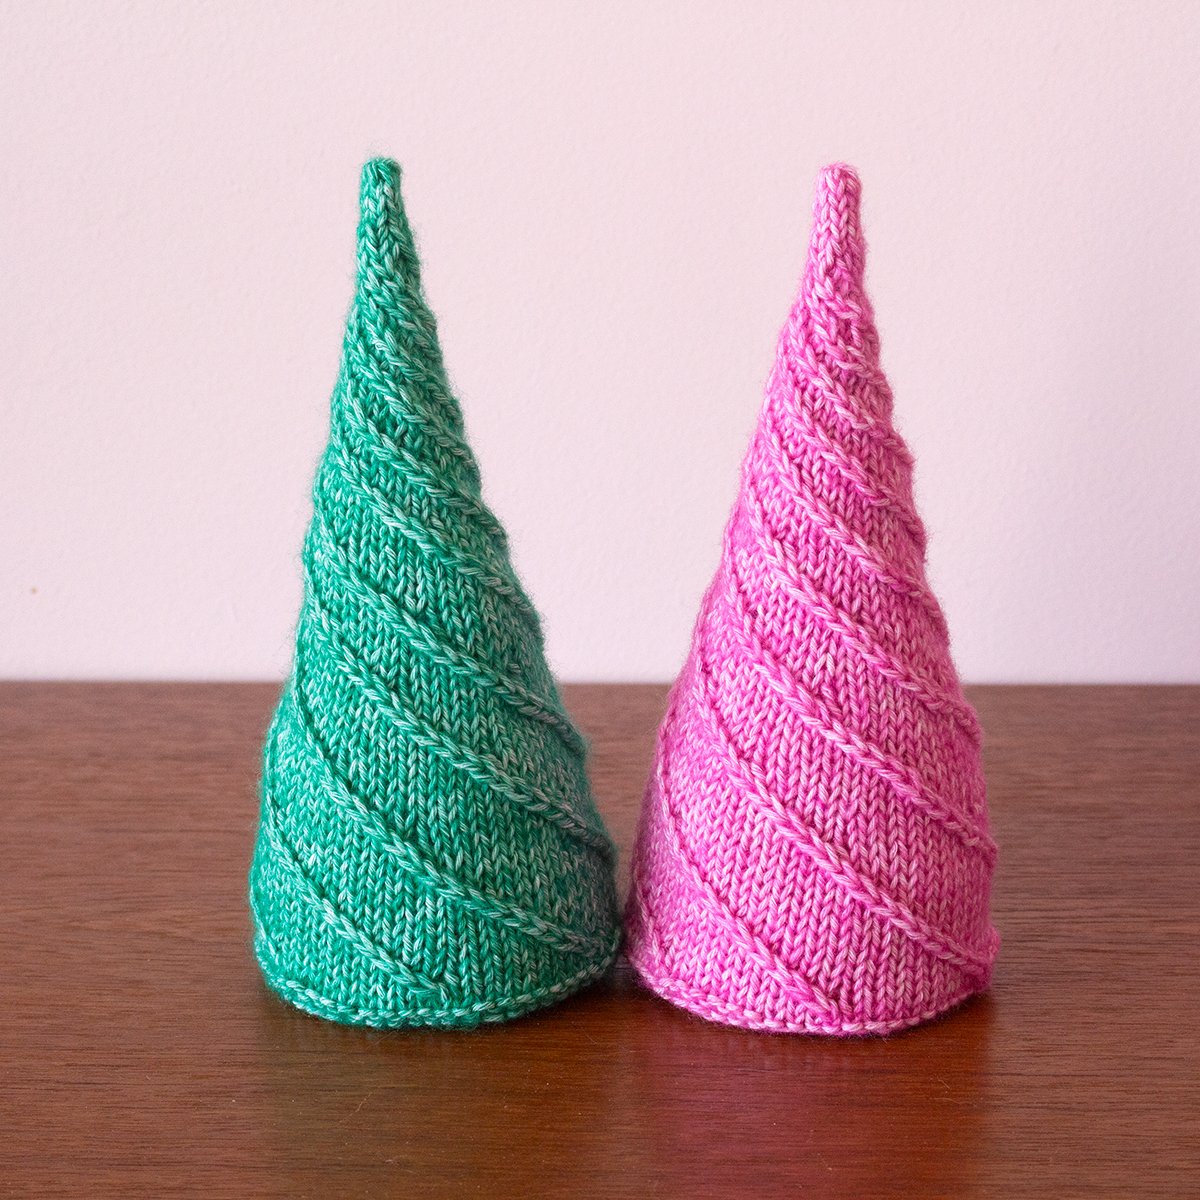
Introducing Candy Cones, a collection of little stuffed ‘trees’ which I designed to brighten up my apartment during the holidays. I've been wary of putting up a proper Christmas tree because my cats like to get into absolutely everything, so I designed these as a safe (and cute!) alternative. With five texture options, you can choose the difficulty level according to what you feel like knitting: stockinette, or mini bobbles, or fiddly travelling cables. And they’re so nice and quick it’s hard to make just one.

Three colourful knitted Christmas trees, being arranged for the holidays

Inspiration & design journey

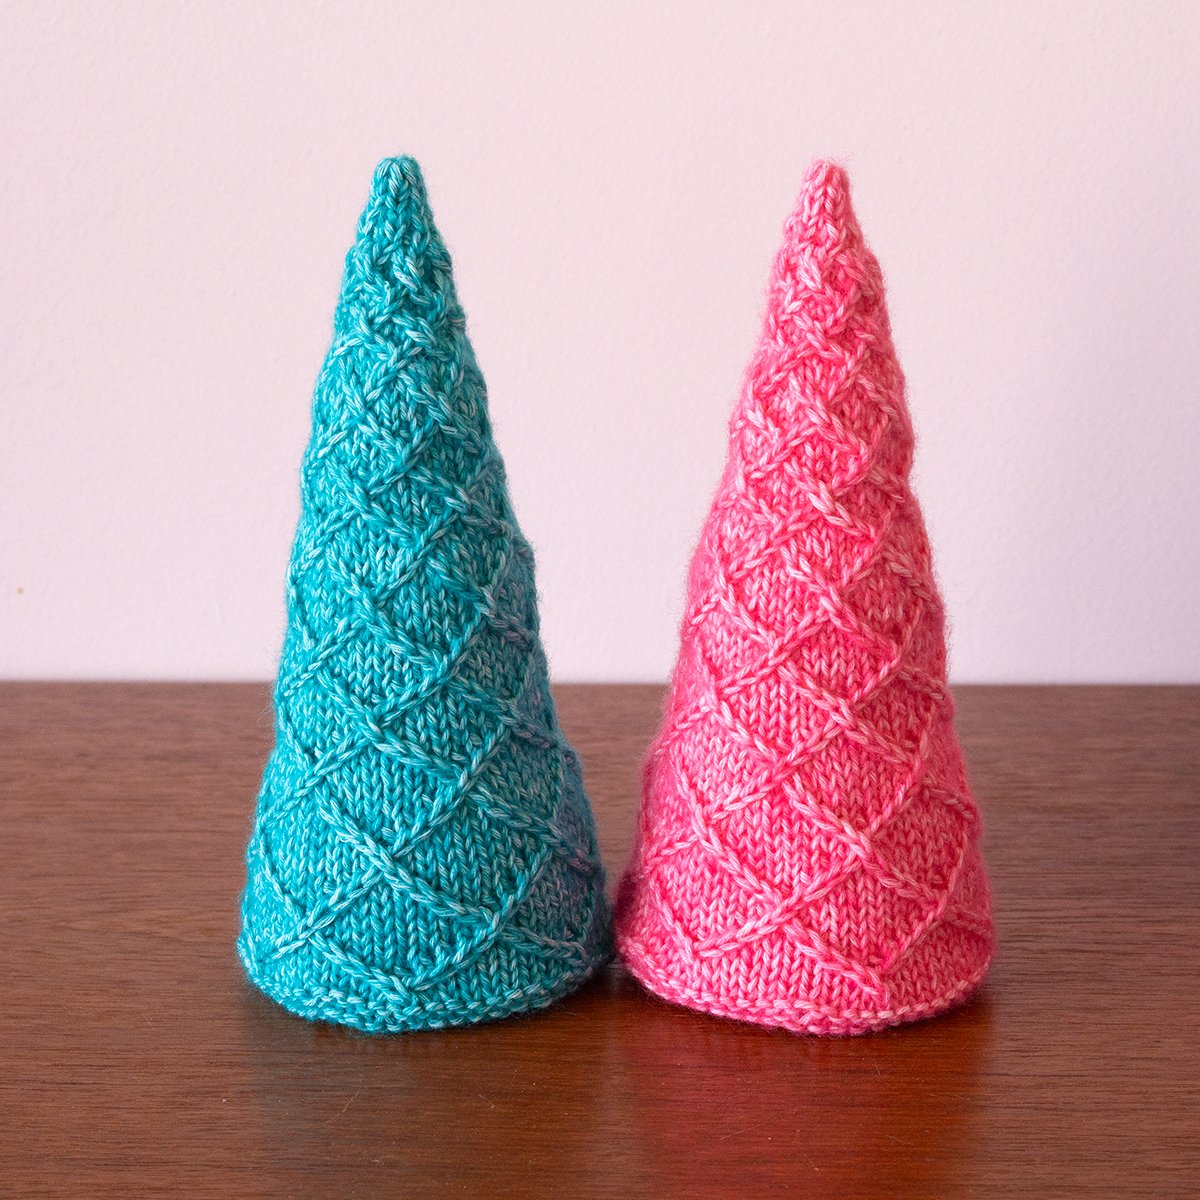
The cable textures for these little cones went through a number of iterations, and taking them from my rectangular swatch to the actual cone shape threw up a few surprises. It turned out that dotting the diamond-trellis and swirl cables with bobbles made for a much too fiddly knitting experience once shaping was brought into the mix, so after some head-scratching I edited out the additional bobbles. I want these little cones to be fun to make as well as to look at, and sometimes making things extra complicated is just not worth it. While the final cable textures are still fiddly, especially in the later rounds, they’re still doable - and those last few rounds are over in a flash!

A collection of knitted Christmas trees with cable and bobble textures

Yarn requirements

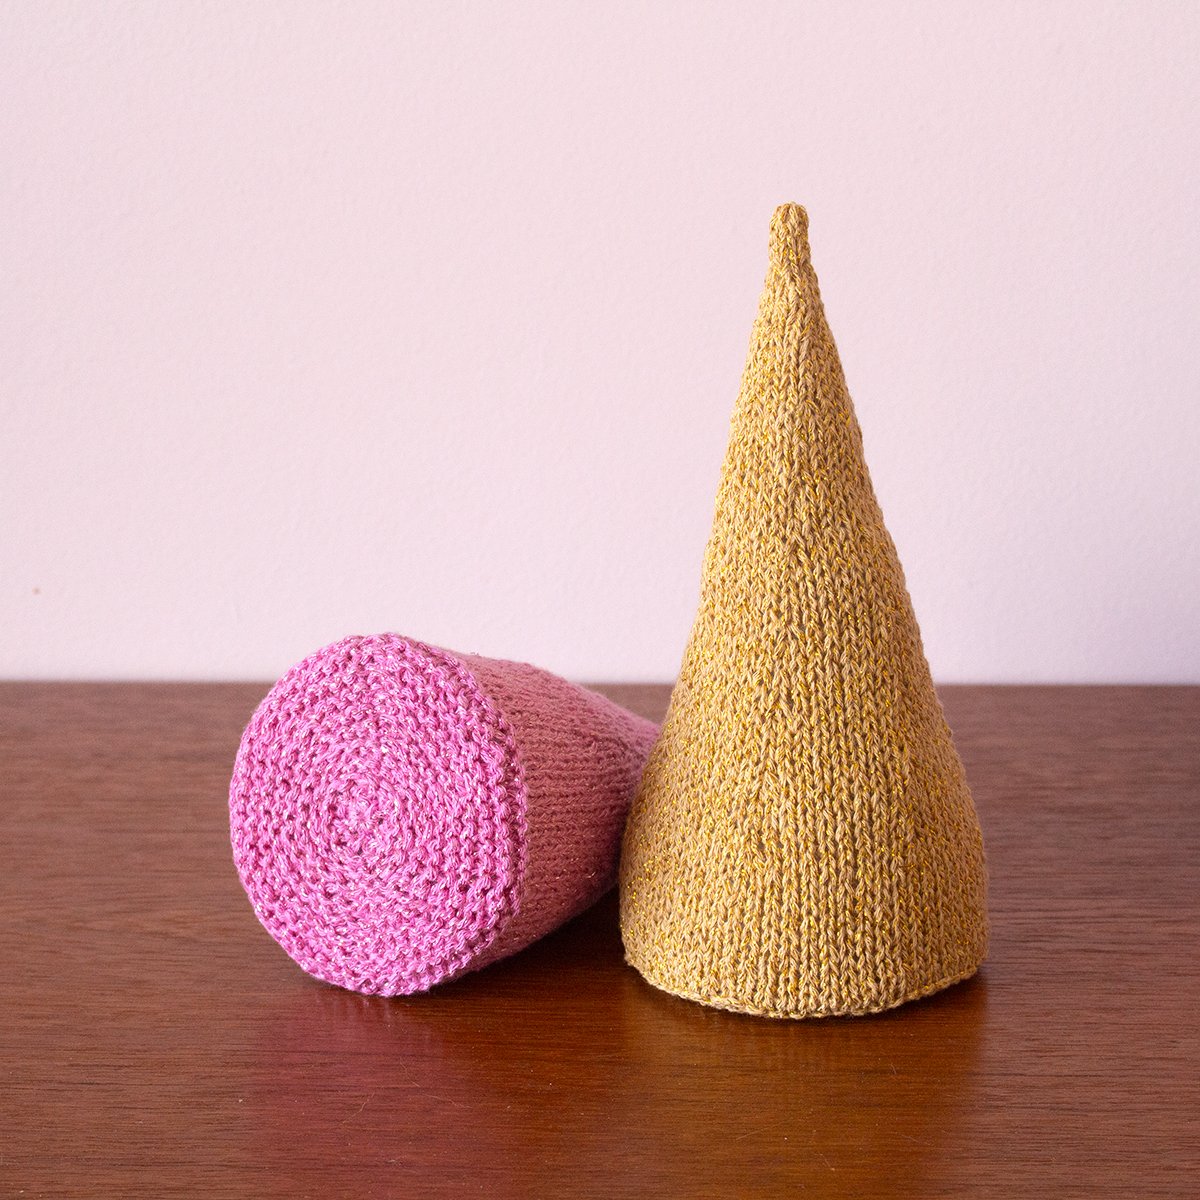
When I was choosing my yarns for this pattern, the most important thing was colour. I wanted clear, cheerful colours in pinks and greens, ideally available in smaller balls or skeins so that I could use a few different shades. I settled on Scheepjes Stone Washed (78% cotton, 22% acrylic; 142yds/130m per 50g ball) in Tourmaline, Rhodochrosite, Turquoise, and Malachite for my cable and bobble textured cones, which has a subtle semi-solid look that shows off the textures well. For my stockinette cones I used Scheepjes Twinkle (75% cotton, 25% polyester; 142yds/130m per 50g ball) in 923, 926, 934, and 941, which has a pretty lurex sparkle that’s tricky to capture on camera.

Special techniques

Each cone begins with a Pinhole Cast On. My favourite tutorial for this method is this illustrated one by Emily Wessel of Tin Can Knits: Pinhole Cast-On.

After working the base in garter stitch, it’s time to pick one of the five texture options and knit the cone. If you haven’t tried knitting mini bobbles before, you might find my tutorial useful: How to work mini-bobbles. And if you’d like to try my favourite method for working the little 1-over-1 cables, I have a tutorial for that too: How to work mini-cables without a cable needle. A few of my clever test knitters added beads to their cones, which is a really cute modification! I’m currently working on a tutorial for a beaded cone as a bonus option, so look out for that in the next few days.

I recommend adding a circle of cardboard or plastic to the base of the cone just before you work the first decrease round, to keep the base nice and flat. You can also add tiny weights on top of the circle if you wish (e.g. poly pellets or pebbles). Begin to add stuffing to the cone when you are about two thirds of the way through the patterned rounds, and then add more just before you work each remaining decrease round. I’ve included the photos below as a visual example of when to stop and stuff.

A guide to stuffing knitting Christmas trees

Candy Cones features:

  • Stuffed decorative cones (or trees) with five texture options to suit your preference

  • Each cone requires less than half a 50g ball of sport weight yarn: 47yds/43m (for stockinette cones) or 67yds/61m (for patterned cones)

  • Shown in Scheepjes Stone Washed (78% cotton, 22% acrylic; 142yds/130m per 50g ball) and Scheepjes Twinkle (75% cotton, 25% polyester; 142yds/130m per 50g ball)

  • Choose a springy yarn to make the cable and bobble textures easier to knit

  • Dimensions when stuffed: 3.25”/8.5cm diameter at base, and 7”/18cm tall.

Knitted Christmas trees being knocked over by cats

I can confirm that they stand up to cat shenanigans pretty well! One cone even survived a stabbing with a plastic pterodactyl beak at the hands of my four-year-old nephew, which is pretty impressive if you ask me.


Find out more about my Candy Cones pattern, including Ravelry and Payhip purchase options.

New pattern: Braeburn Mitts

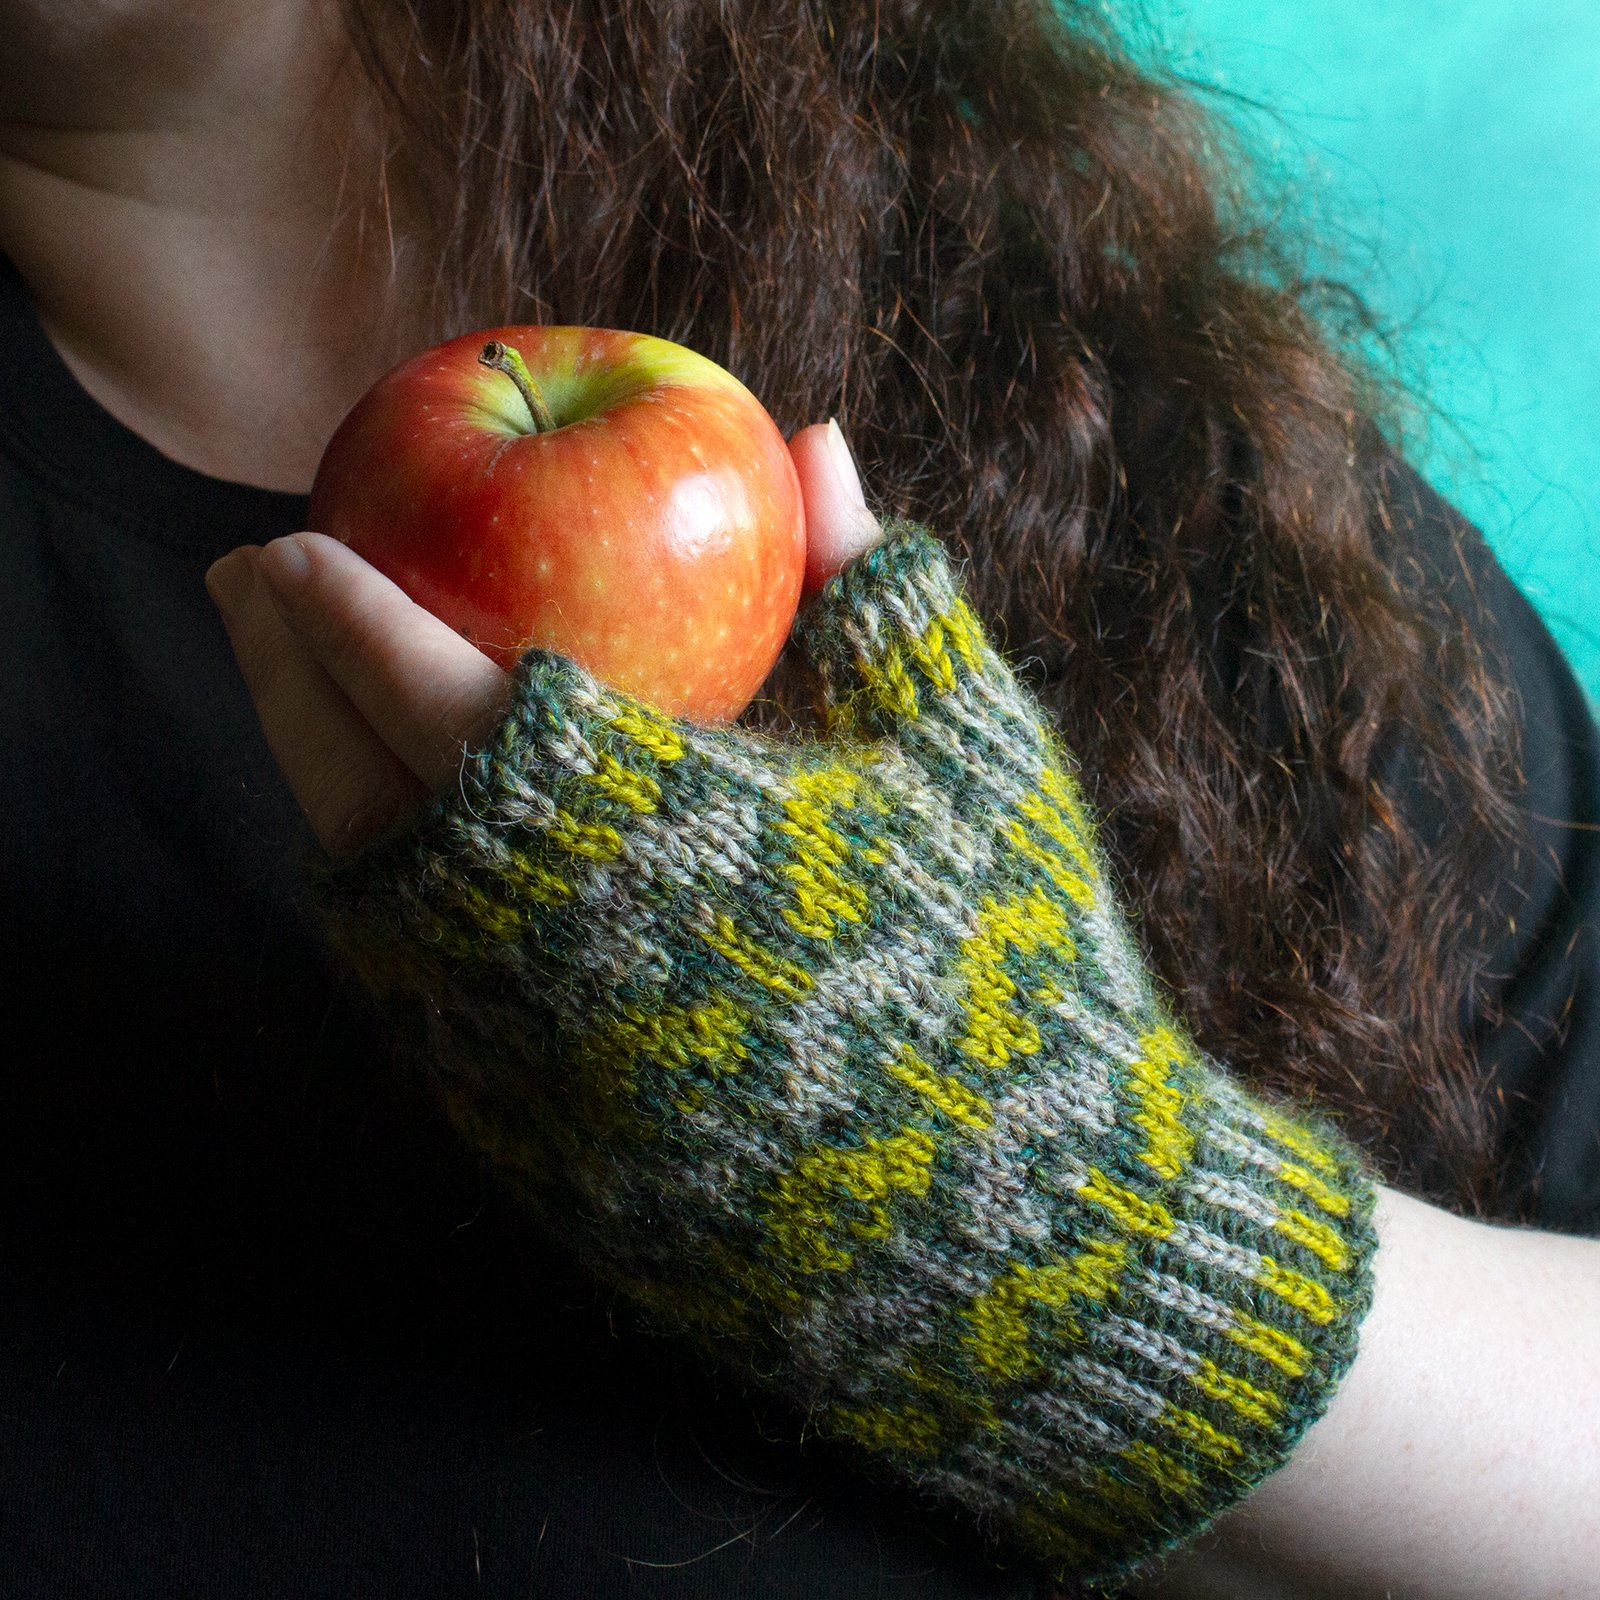
Fellow colourwork lovers, this one’s for you! I’ve designed the Braeburn Mitts to show off three colours of Appledore DK, and I couldn’t resist naming them after my favourite variety of apple, which is always one of the first things I buy when I fly home to New Zealand. Because you only need a small amount of each colour, these mitts are a perfect project for mini skeins and odds and ends. The pattern includes three sizes, and options are included for shorter or longer cuffs.

Stranded colourwork mitts in two colour combinations with autumnal pinecones and a red apple
Amy is wearing a yellow and green fingerless mitt and holding up an apple

Inspiration & design journey

This is one of those designs that all started with the yarn. I had a shade card and some little samples of this lovely woolly heathered yarn, and I decided a pair of colourwork mitts would be the perfect way to show it off. I wanted to use three colours instead of my usual two for extra richness, and I wanted to use a smaller motif to make it easy to include multiple sizes. After a lot of charting and swatching with my samples I had a motif I loved, of highly stylised little trees. The next puzzle to solve was the thumb gussets, which went in a few directions before I settled on a pattern of clean vertical lines branching out from the increases along the edge.

Yarn requirements

To knit these mitts you will need small amounts of three colours of light DK or sport weight yarn suitable for colourwork. For my two sample pairs I used mini skeins of Appledore DK, a blend of 40% Devon Closewool, 40% Romney, and 20% Exmoor Blueface wool, with 68yds/62m per 25g mini skein. For the smallest size you will need one mini skein of each colour, and for the two larger sizes you will need two mini skeins of the MC or background colour and one each for the contrast colours CC1 and CC2.

The Appledore colour names are wonderful, and are all taken from apple varieties. My samples feature the shades ‘Hangy Down’, ‘Whimple Wonder’, ‘Golden Knob’, ‘Foxwhelp’, and ‘Pig Snout’!

A small grey cat is playing ferociously with skeins of woolly yarn

My little yarn-thief Miss Tiny had a great time wrestling with my mini skeins before I managed to rescue them! She loves a good woolly yarn.

A pair of stranded colourwork mitts in autumn colours

Special techniques

The pattern includes a few of my favourite tips for knitting beautiful colourwork, including on colour dominance, swatching, and managing tension. One additional trick, which you may have used before when knitting stripes, is ‘carrying up’ each colour until you need it again instead of breaking the yarn and having a daunting number of ends to weave in. I found I had nice tidy colour changes if I twisted my CC colours together every couple of rounds.

Using mitten blockers is another great trick for nicely finishing your mitts - I made my own out of takeaway container lids using this tutorial by designer Åsa Tricosa: Glove & Mitten Blockers in 10 min.

Braeburn Mitts features:

  • Fingerless mitts in stranded colourwork featuring stylised tree motifs and bold corrugated ribbing

  • Three sizes are included, to fit 5.5-6.5 (7-8, 8.5-9.5)”/14-16.5 (18-20.5, 21.5-24)cm palm circumference with -0.5”/1.25cm to +0.5”/1.25cm ease, and options are given for shorter or longer cuffs

  • Requires 66 (79, 104)yds/60 (72.5, 95)m of MC or background colour, 30 (36, 50)yds/27 (33, 46)m of CC1, and 30 (36, 44)yds/28 (33, 40)m of CC2 in light DK or sport weight yarn (shown in John Arbon Textiles Appledore DK)

  • Size 2 shown in MC ‘Hangy Down’, CC1 ‘Whimple Wonder’, & CC2 ‘Golden Knob’, with short cuff, and Size 3 shown in MC ‘Foxwhelp’, CC1 ‘Golden Knob’, & CC2 ‘Pig Snout’, with long cuff

  • Choose a wool or wool-blend yarn suitable for colourwork, in colours with sufficient contrast

  • Dimensions, relaxed after blocking: 6 (7.5, 9)”/15.25 (19, 23)cm circumference, and 6.75 (6.75, 7.5)”/17 (17, 19)cm total length with short cuffs for Sizes 1 & 2 and long cuffs for Size 3.

Hands wearing knitted mitts in green and yellow, holding a pinecone

Find out more about my Braeburn Mitts pattern, including Ravelry and Payhip purchase options.

Pattern update: The Beeswax Set

My Beeswax Hat, Cowl, and Mitts have been some of my most popular patterns since I first published them nearly a decade ago. My pattern writing has evolved a lot since 2014 when I first published them, and even more since 2018 when I last updated their charts and layout. And because I want them to continue to reflect my best work as a designer, I’ve been working on a big update to polish them up.

The Beeswax Hat, Cowl, and Mitts, a set of knitted accessories with honeycomb cables

The Beeswax Hat, Cowl, and Mitts knit in Pakihi DK from Ruataniwha Dye Studio.

The changes

My main intention was to update the ribbing instructions, which I’ve had the occasional question about over the years. But after making that change and looking more closely, I found more and more tweaks I wanted to make. One of the new changes I’ve made is updating the cables to include purl stitches, where they originally included only knit stitches for the sake of simplicity. I decided the slightly more polished look of the purl cables was worth making the switch. It doesn’t make a huge difference to the appearance of the cables, but I personally find it more satisfying!

Additional changes include a new smaller size for the Beeswax Hat (for kids!), a taller option for the Beeswax Cowl, a larger gauge option for the Beeswax Mitts, stitch counts added throughout to reflect the variable stitch pattern repeat, new schematics, and additional small tweaks to bring the patterns in line with my current style.

The Beeswax Hat and Beeswax Cowl, showing off the honeycomb cable pattern and crown decreases

I blocked this Beeswax Hat over a balloon to show off the pretty crown decreases. The Beeswax Cowl in the background is the new taller size.

New samples

As part of this process I knit up some new samples to show off the new sizes. As a designer I find knitting my way through a pattern super helpful, because I can refine it as I go and catch any errors. For most of the new samples I used Pakihi DK from Ruataniwha Dye Studio, a woollen-spun blend of NZ polwarth and arapawa wool. The cables are beautifully crisp in this yarn! And for the smaller Beeswax Hat, I used Possmerino DK from Trichromat Yarns, which has a lovely soft halo and luxurious softness.

A child size Beeswax Hat with honeycomb cable pattern

The new smaller Beeswax Hat, knit in Possmerino DK from Trichromat Yarns.

Finally, I had the updated patterns professionally tech edited to make sure they’re as clear and error-free as possible. I hope you love the refreshed patterns, which are now available on Ravelry and Payhip.

New patterns: Herb Garden Hat & Cowl

I’m continuing my obsession with botanical shapes in knitting with a colourwork hat and cowl duo, featuring lush leaves framed by delicate linework. The Herb Garden Hat and Herb Garden Cowl are named for the sensory delight of a garden overflowing with herbs, humming with bees, and bursting with culinary possibilities. I have a little pot of herbs on my balcony which provides rosemary for roast potatoes, thyme for sauces and pizzas, and flowers for visiting bees. I’m planning to add some basil and mint to my collection this summer!

Inspiration & design journey

Like my Cat’s Eye Cowl, this design started off with me messing around with geometric patterns, shuffling elements around and rounding the shapes until I had something satisfying-looking. I noticed it had a leafy feel to it, and I tried to bring that out further as I kept playing around. Once I was happy with the leaf elements, I added geometric lines to frame them and bring the ribbing into the design. This framing also has the benefit of reducing the need for long colourwork floats while knitting.

While I was working on the hat, I took a couple of attempts (as usual) to get the crown decreases right. I wanted them to look nicely balanced with the ring of colourwork leaves while giving me the fit I wanted - not too slouchy, and not too close-fitting. I used a lifeline while knitting my second sample so I could make any final tweaks to the design without ripping back further than I needed to. It’s definitely possible to rip back without using a lifeline, but colourwork makes it tricky!

In this one I’m doing my best to look like a Dutch painting.

Yarn requirements

I knit each of my samples using 2 skeins of Vintage Purls Superstar, a blend of 70% New Zealand polwarth, 20% tussah silk, and 10% black New Zealand merino at 415yds/380m per 100g skein. I chose the undyed ‘Natural Talent’ shade for the contrast colour for both hat and cowl, and the main colour ‘Zosma’ for the hat and ‘Carina’ for the cowl. The new Vintage Purls Tannahill yarn would also be ideal for these designs, as it’s a woollen-spun merino especially recommended for colourwork.

Special techniques

The Alternate Cable Cast On suggested in the patterns gives a nice tidy edge, but feel free to use your favourite cast on for 1x1 ribbing. The Long Tail Cast On and Tubular Cast On would also look great. Both patterns include a few of my favourite tips for knitting beautiful colourwork, including on colour dominance, swatching, and managing tension.

Sasha wanted to be involved in the photoshoot - who could say no to that face?

Herb Garden Hat features:

  • A beanie-style hat featuring an all-over stranded colourwork pattern of foliage and geometric linework

  • Three sizes are included, to fit 20 (22, 24)” / 51 (56, 61) head circumference

  • Requires 75-94yds / 69-86m (MC) and 99-145yds / 91-133m (CC) in fingering-weight yarn (shown in Vintage Purls Superstar 4ply)

  • Choose a wool or wool-blend yarn suitable for colourwork, in colours with sufficient contrast

  • Hat dimensions, relaxed after blocking and unstretched: 16 (18, 20)” / 40.5 (46, 51)cm brim circumference, and 8.25 (8.75, 9.25)” / 21 (22.5, 23.5)cm length from cast-on to crown. Sample shown in medium size on my 22” / 56cm head.

Herb Garden Cowl features:

  • A cowl knit in the round featuring an all-over stranded colourwork pattern of foliage and geometric linework

  • Two height options are included, and the circumference is easily adjustable to your preference

  • Requires 136 (256)yds / 124.5 (234)m (MC) and 212 (335)yds / 194 (306.5)m (CC) in fingering-weight yarn (shown in Vintage Purls Superstar 4ply)

  • Choose a wool or wool-blend yarn suitable for colourwork, in colours with sufficient contrast

  • Cowl dimensions, relaxed after blocking and unstretched: 24” / 61cm circumference, and 9.75 (16.25)” / 25 (41.5)cm height from cast-on to bind-off. Sample shown in taller 16.25” / 41.5cm height.

Find out more about my Herb Garden Hat and Herb Garden Cowl patterns, including Ravelry and Payhip purchase options.